本系统建议在净版的 Centos 进行安装,推荐使用 Centos 7 以上的系统进行安装使用。
系统需要 Nginx 支持,采用的是 Mysql 数据库,需要关闭防火墙。
数据库采用的是 Mysql 数据库。
安装采用 rpm 的方式进行,要求安装人员对 Centos 系统有一定的了解。
安装 Cloudinstall 需要 4GB 硬盘空间,可以视所需的操作系统镜像大小来扩展硬盘空间
配置建议:
| 配件 | 最低配置 | 推荐配置 |
|---|---|---|
| 内存 | 2G | 8G 或更多 |
| CPU | 2核心 | 4核心或更多 |
| 硬盘 | 10GB | - |
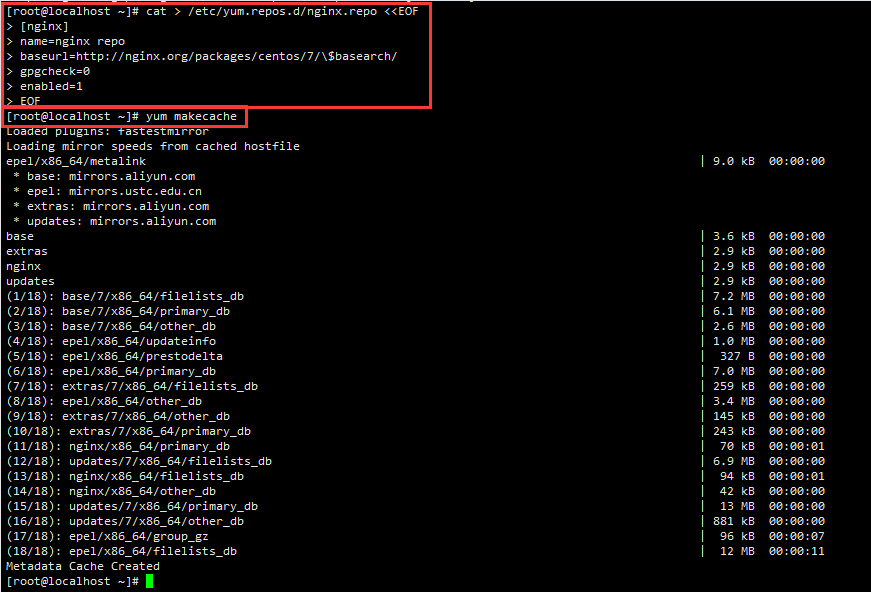
默认源未包含 nginx 时,使用以下的 nginx yum 源(下面指令是多行录入,可直接复制执行):
cat > /etc/yum.repos.d/nginx.repo <<EOF
[nginx]
name=nginx repo
baseurl=http://nginx.org/packages/centos/7/\$basearch/
gpgcheck=0
enabled=1
EOF
然后重载缓存:
yum makecache
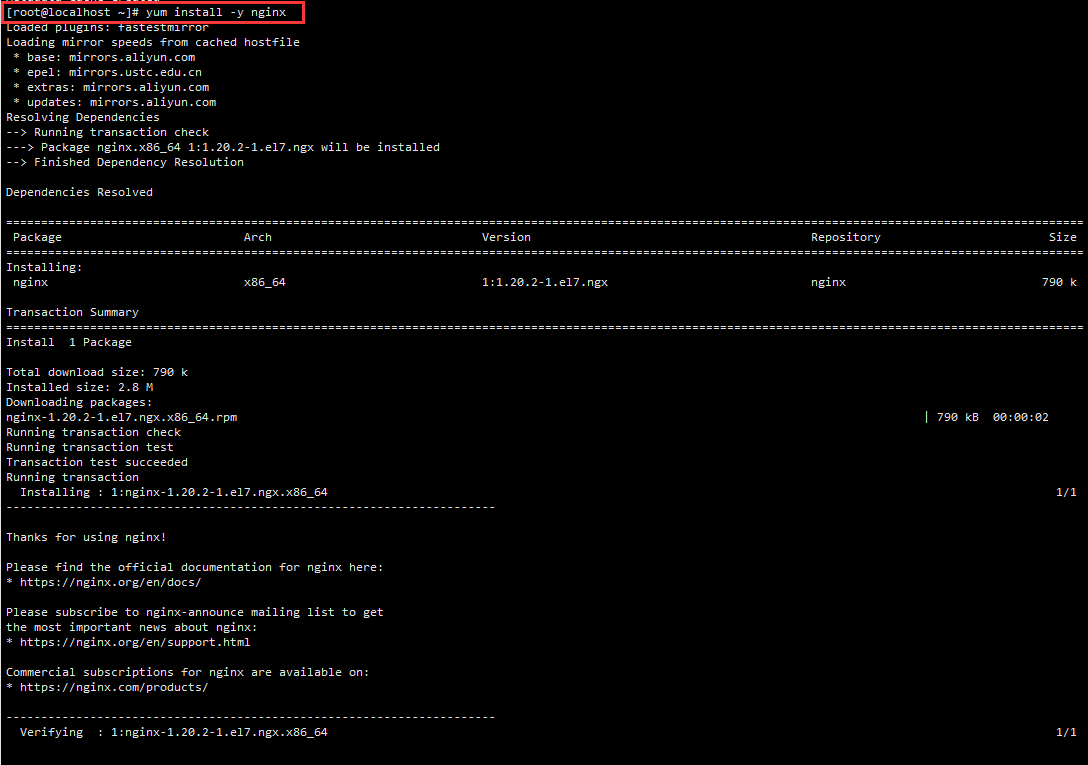
接着执行安装 nginx 指令:
yum install -y nginx
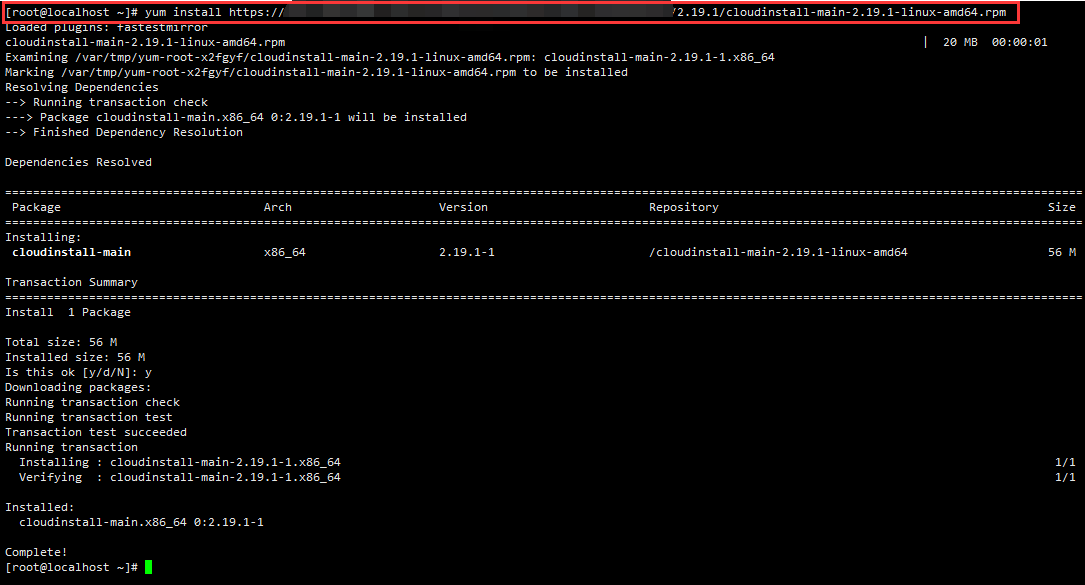
安装中控程序:yum install https://cos.qstack.net/download/cloudinstall/3.6.0/cloudinstall-main-3.6.0-linux-amd64.rpm
3.6.0为版本号,请根据需要安装的版本自行更改。
未安装防火墙的用户可以跳过此步骤
如果有安装防火墙,需要先关闭防火墙:
systemctl stop firewalld && systemctl disable firewalld

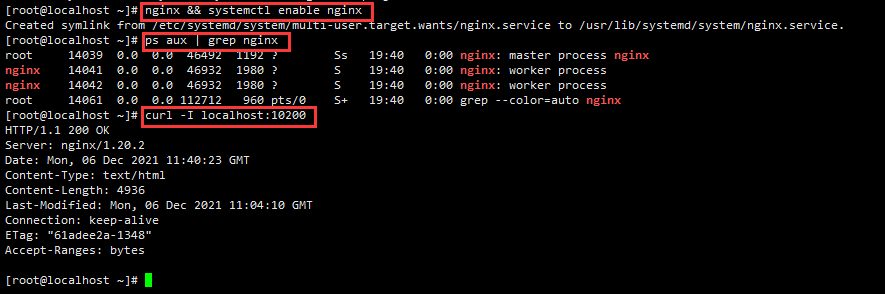
启动并将 nginx 设为开机启动:
nginx && systemctl enable nginx
检查 nginx 是否已经启动:
ps aux | grep nginx
测试本地连接是否畅通,cloudinstall 默认监听 10200 端口:
curl -I localhost:10200
重载服务:
systemctl daemon-reload
开启服务:
systemctl start cloudinstall@guard cloudinstall@server
设置开机自启服务:
systemctl enable cloudinstall@guard cloudinstall@server

系统需要使用Mysql数据库,如果服务器已经安装了Mysql数据库,可以跳过此步骤。
以下内容在 CentOS Linux 7.6.1810 (Core) 超级账户下经过验证
安装
安装 MySQL yum repo
$ yum install -y https://repo.mysql.com/mysql57-community-release-el7.rpm
安装 MySQL Server 5.7.36
$ yum install -y mysql-community-server --disablerepo=* --enablerepo=mysql57-community
启动
启动 MySQL Server
$ systemctl start mysqld
在服务器初始启动时将默认创建超级用户帐户‘root’@’localhost’,设置超级用户的密码并将其存储在错误日志文件中,请使用以下命令获取密码
$ grep 'temporary password' /var/log/mysqld.log
2021-12-23T02:59:32.831367Z 1 [Note] A temporary password is generated for root@localhost: 6<8irj04roI;
数据库配置
使用生成的临时密码登录,并为root用户帐户设置自定义密码:
密码至少包含一个大写字母、一个小写字母、一个数字和一个特殊字符,并且总密码长度至少为8个字符。
$ mysql -u root -p
mysql> alter user 'root'@'localhost' identified by '新密码';
Query OK, 0 rows affected (0.00 sec)
创建新 MySQL 用户
mysql> create user 'cloudinstall'@'localhost' identified by '新密码';
Query OK, 0 rows affected (0.00 sec)
授予用户登录权限
mysql> grant usage on cloudinstall.* to 'cloudinstall'@'%' identified by '新密码' with grant option;
Query OK, 0 rows affected, 1 warning (0.00 sec)
赋予任何主机使用密码远程访问数据库权限
mysql> grant all privileges on cloudinstall.* to cloudinstall@"%" identified by '新密码';
Query OK, 0 rows affected, 1 warning (0.00 sec)
刷新权限,使配置生效
mysql> flush privileges;
Query OK, 0 rows affected (0.00 sec)
创建数据库
mysql> create database cloudinstall;
Query OK, 1 row affected (0.06 sec)
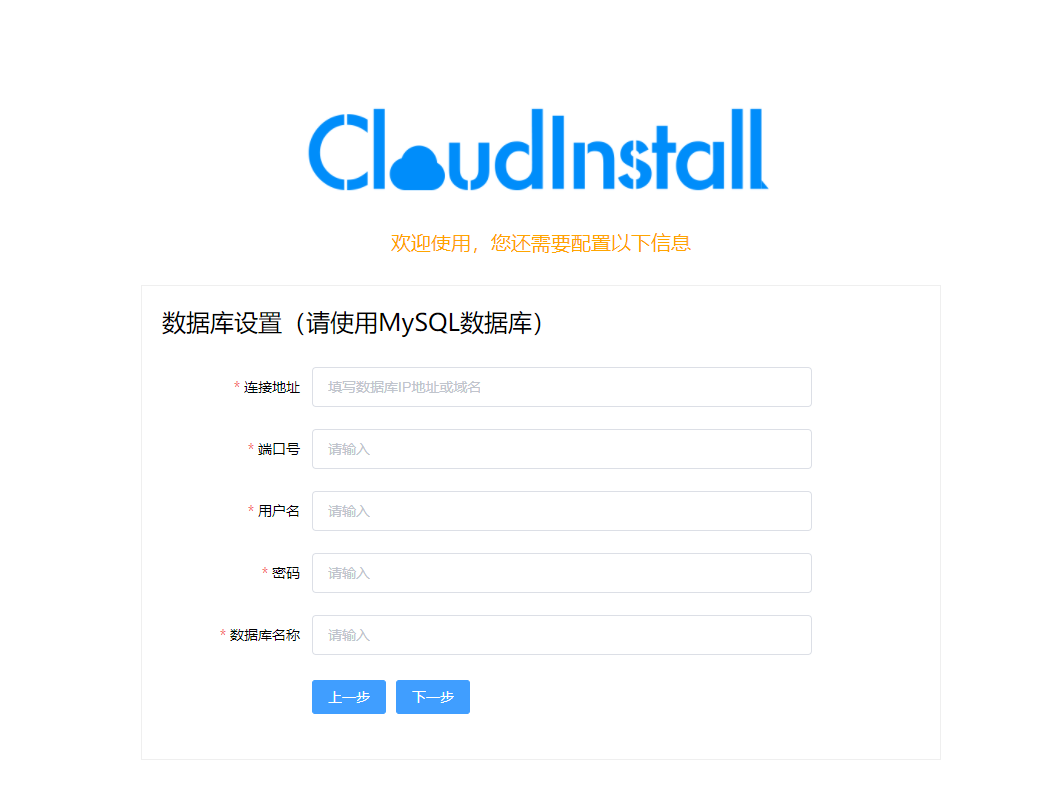
访问浏览器 http://服务器IP或域名:10200 ,开始进行进一步web服务和数据库安装:

同意协议后点击下一步。
填写系统的数据库的连接IP或域名地址、端口号、用户名、密码和数据库名。
数据库只支持Mysql数据库,需要提前先建一个空数据库,再填写数据库信息进行系统安装。
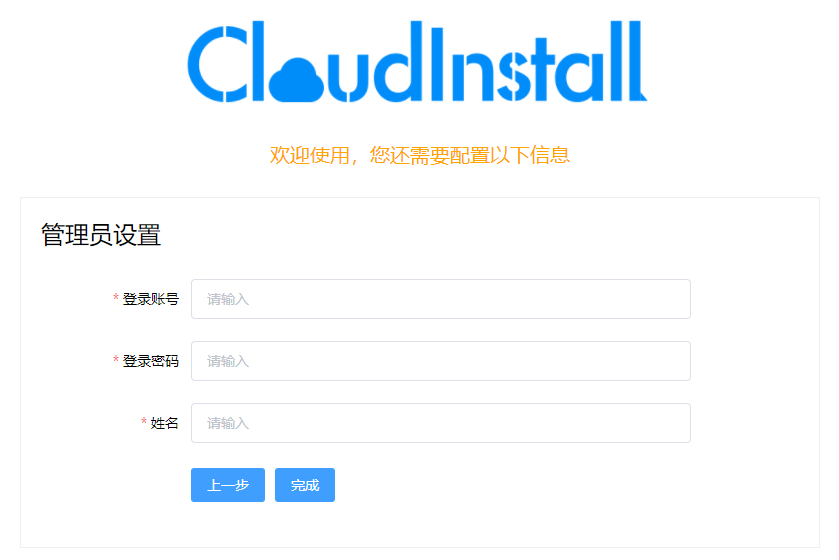
最后,输入系统管理员的初始账号和密码,以及管理员姓名,点击完成,即可完成安装。
安装完成后会自动重启web服务,可能会有段时间无法访问系统的情况。
系统完全安装完毕后,会自动跳转到系统的登陆界面,之后用系统管理员的初始账号和密码即可登陆系统。